How to order premade stones
Premade Stones are being featured on the front page. They come with a description of how this stone will be sold: An opening date (first come first serve with a set price) for when the stone goes up for sale or a link to an auction (usually on my discord server).
Payment is usually being processed through KoFi. I don’t accept any other types of payment (such as expooooosure) except if I am the one that approaches someone first, offering a trade (art trade, etc).
I will hold your stone after we finalized the sale for 5 days. If I haven’t received payment by then, the stone will go back up for sale. Once the stone is shipped to you, there will be no refunds possible. As per my terms stated on the front page, I have the right to decline selling a stone for any reason.


How to order Custom Stones
Custom Stones are only available if the Custom Stone Badge is among the front page’s offers.
For a custom commission you do require writing me on either my Twitter or Discord. Let me know which stone class you want, the theme (color scheme, WoL, NPC, location,…) and what country the stone will ship to. Then I can make you a couple suggestions what we could try and name the price + shipping.
If you agree to the offer, you will have to send me the first half of the payment before I start working. Due to the long curing times of resin etc it can take between 2-6 weeks for a stone commission to be finished. This also highly depends on the amount of layers that needs to be added to create certain effects as well as weather etc. If you have a certain date you absolutely need the stone by, please let me know and I can see what I can do (prioritizing your order, making a couple of effects with UV resin etc, but they do not turn as hard and crystal clear as jewel resin,…).
Once the stone is finished, I will send you a picture of the finished stone and you can send me the second half of the payment. Once I received it, I will bring the order to the mail and ship it to you (with tracking number).

How to order other Items
Sometimes I put up other offers such as my artbooks, prints, dice sets, etc… The sale of these items works exactly the same as for premade stones.
Shipping Rates
I’m shipping from Germany via DHL with package tracking. Shipping is charged per order, not per item. So if you order one stone it will be the same shipping rate as ordering 3 stones.
I try keeping my packages this small/light. Should you order multiple items and we are getting above the weight/size limit, I will take over the additional cost so you don’t need to spend any extra money on shipping.
- Shipping to Germany - 5,49€
- Shipping to EU countries - 12,99€
- Shipping to UK and Switzerland - 17,49€
- Shipping to the rest of the world - 21,99€


Material
In this section you can read about different resin techniques that I am able to provide. Usually, resin stones are a combination of different techniques to get the desired effect.
The epoxy resin
I’m using Let’s Resin Clear Crystal Resin and Dipon 3D EpoxyPlast B20 Jewelcast Resin depending on the effect I wish to achieve.

Inserts
There are all sorts of items that can be placed within resin. As a rule of thumb, almost all inserts sink and thus need a ‘bottom layer’ when casting. An exception of this are dried plants. They tend to float and instead need a ‘top layer’. Inserts are a great way to make your job stone unique! Almost everything can be placed in resin: sea shells, gold ornaments, beads,… If you are looking for something specific, please ask beforehand if I am able to provide it.
Glitter
ALL the glitter!
I have different glitter and glitter shapes. If you are looking for something specific, please talk to me. There is also glow in the dark glitter, iridescent/color changing glitter and flakes or metal foils. There is also glow in the dark glitter and interference glitter (changing color depending on the surroundings and lighting)
Glow in the Dark Glitter
Charged with UV Light, some of the glitter lights up in the dark and keeps glowing for a while until running out of charged light.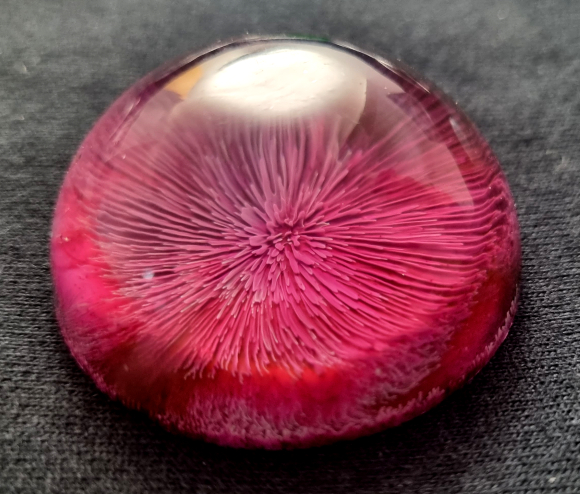
Alcohol Inks
There are different types of alcohol inks. I have a standard set with 24 colors for petri effects as well as different alcohol dyes to tint the resin itself (sky blue, etc).
Metallic Alcohol Inks
Metallic alcohol inks tend to sink a LOT more than regular inks. The effect achieved can be very interesting but it is something to consider. It helps a 3-dimensional look but can also make it appear dirty, colors not shining as brilliantly.
Mica Powder and Opaque Resin Dye
Mica is a beautiful shimmering powder that can be mixed into resin. Pigment Pastes are available in 4 regular colors (red, blue, yellow, green)+ black and white, but they can be mixed to get other colors as well. There also is copper, gold and silver pigment paste.
Paint
Smaller patterns and drawings can be added straight onto resin layers. Acrylic paint and resin to NOT mix well though, so drawn patterns must not reach the edge of the design.
Microglitter
Microglitter is very fine glitter that can be put into resin but still make it stay see through. That way the layer gets a nice glittery effect without disturbing the view on the colors or patterns of the following layers.
Cloud Effect
In combination with alcohol ink, sinker ink can create nice, interesting patterns, whisps and cloud effects. This effect is highly uncontrollable though, so effects can varry VERY much!
The Process of creating Job Stones
I create my own molds made of silicone.
As of now I have the following molds available:
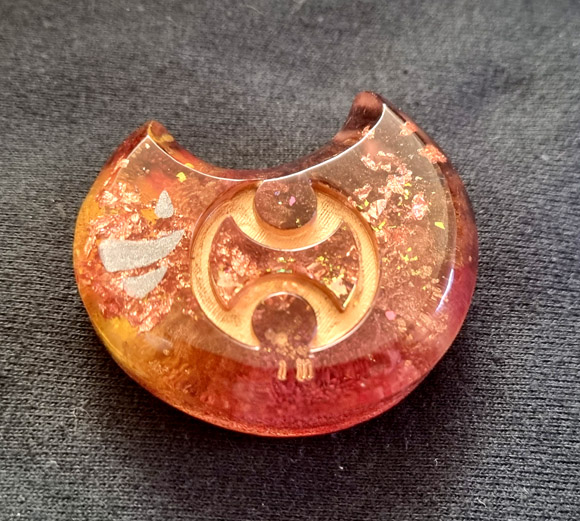
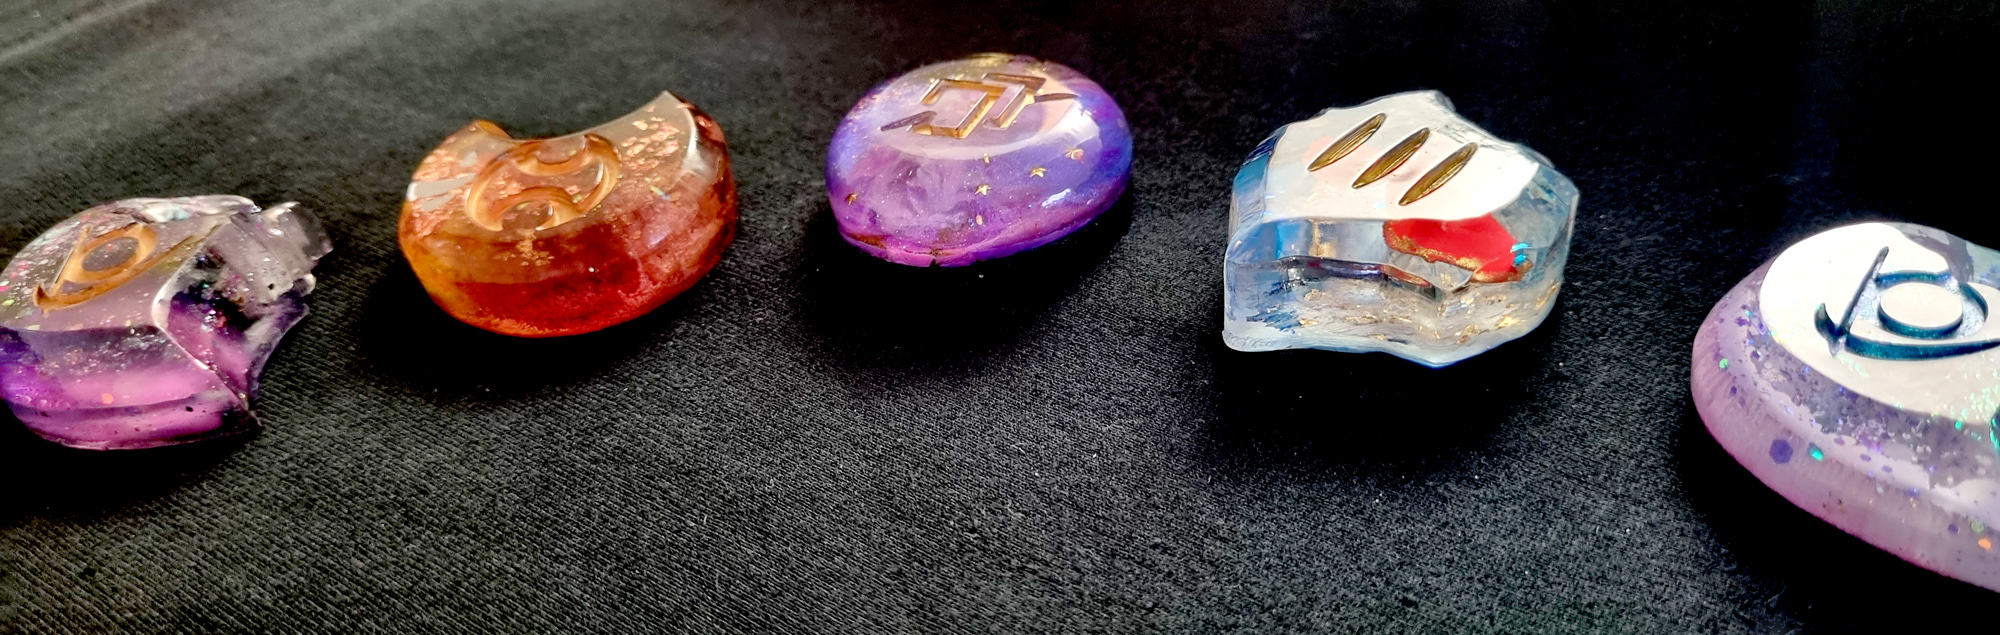
Azem crystal (slightly smaller than the normal job stones)
All DoW Classes up to Endwalker + BLU stone
Each mold can hold between 3-4 layers of resin. Resin is a highly allergen substance before curing (I use food safe grade, so once they cured they are perfectly safe). Thus, I need to work with protective gear (gloves, FFP3-mask) as well as only being able to mix the resin outside. On stormy or very rainy or snowy days I can NOT proceed making stones, thus it can happen that a stone is delayed by a bit if weather conditions make it hard to work.
Each technique above usually needs one layer of resin. Some can be mixed with each other but most require their own layer. The resin takes about 24 hours to cure and another 48 hours at least to reach its final hardness. Only at this stage, the resin can be sanded or polished without the result turning out streaky or milky. Once all layers are fully cured, the stone is left to harden and the back gets sanded down some so there are no more sharp edges and the stone lies flat on even surfaces. (If you wish for custom commissions to have an extra layer/fully polished flat backside, please state so while discussing the stones!)
As a final step, the job symbol gets two coats of acrylic paint.